Karal Max
April 6, 2016
CDN Module, and Amazon Cloudfront in Drupal 7
- Amazon CloudFront
- Drupal 7
- Drupal Planet
Drupal CDN Module
Recently I decided to check out Amazon CloudFront to use it as a CDN. I felt delighted as it was so easy to set up with drupal and configuring it involves just a few steps. Another thing that excited me was its cost. It is really really cheap, just costs about 12 cents per gigabyte of transfer.
Step 1: Create a CloudFront Web Distribution
To create a CloudFront web distribution
- Open the CloudFront console
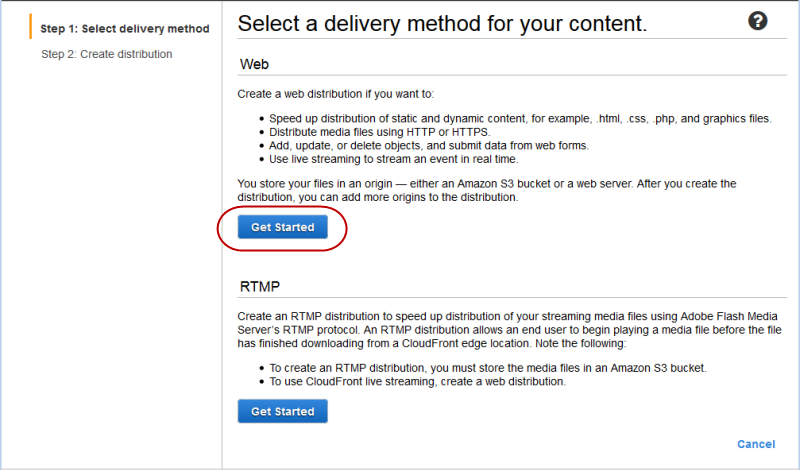
- Choose to Create Distribution.
- On the Select, a delivery method for your content page, in the Web section, choose to Get Started.
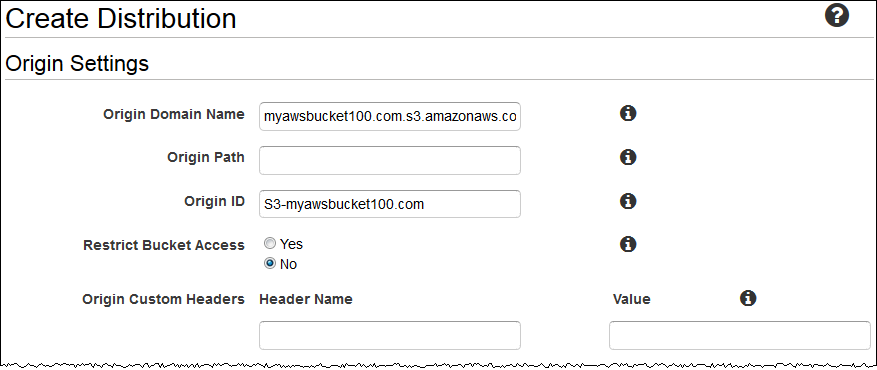
- On the Create Distribution page, under Origin Settings, choose the Amazon S3 bucket that you created earlier. For Origin ID, Origin Path, Restrict Bucket Access, and Origin Custom Headers accept the default values.
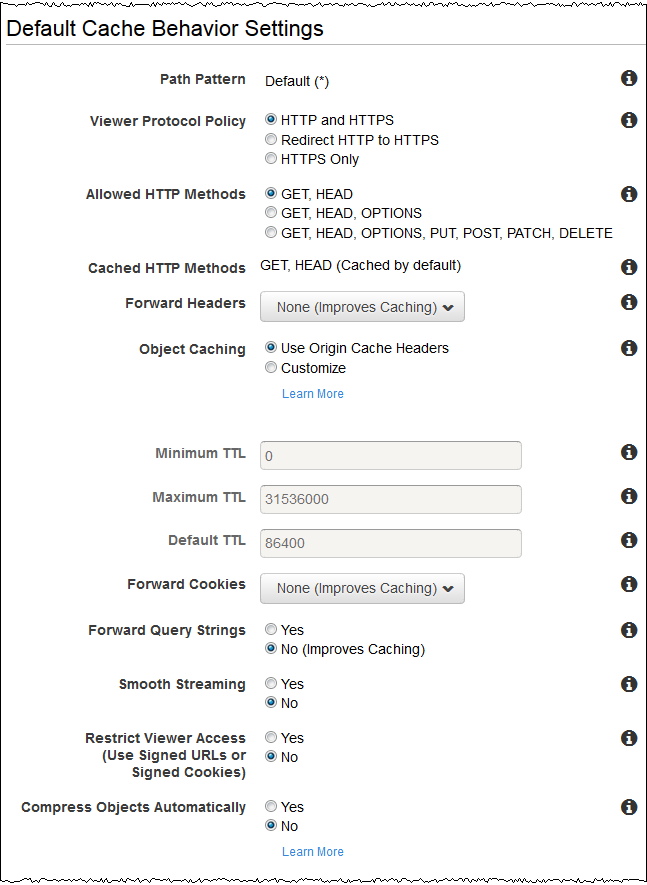
- Under Default Cache Behavior Settings, accept the default values.
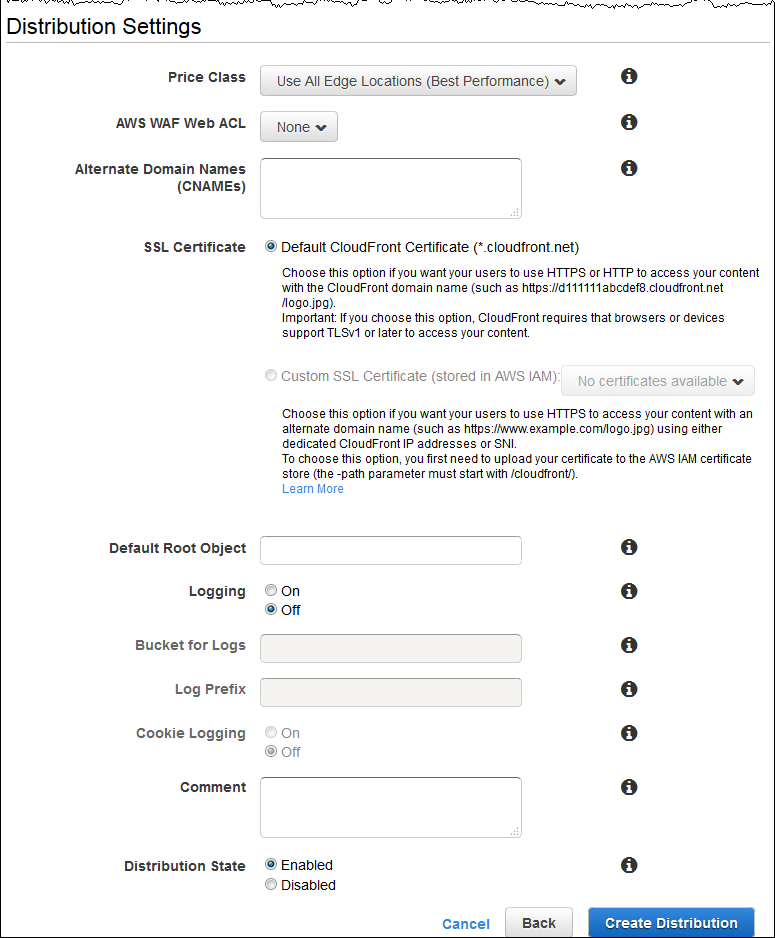
- Under Distribution Settings, enter the applicable values:
- Price Class
Select the price class that corresponds with the maximum price that you want to pay for the AWS CloudFront service. By default, CloudFront serves your objects from edge locations in all CloudFront regions.
- SSL Certificate
Accept the default value, Default CloudFront Certificate.
Alternate Domain Names (CNAMEs) (Optional)
Default Root Object (Optional)
Logging (Optional)
Comment (Optional)
- Cookie Logging
In this example, we're using Amazon S3 as the origin for your objects, and Amazon S3 doesn't process cookies, so we recommend that you select Off for the value of Cookie Logging.
- Distribution State
Select Enabled if you want CloudFront to begin processing requests as soon as the distribution is created, or select Disabled if you do not want CloudFront to begin processing requests after the distribution is created.
- Choose to Create Distribution.
- After CloudFront has created your distribution, the value of the Status column for your distribution will change from InProgress to Deployed. If you chose to enable the distribution, it will then be ready to process requests. This should take less than 15 minutes.
The domain name that CloudFront assigns to your distribution appears in the list of distributions. (It also appears on the General tab for a selected distribution.)
Step 2: Install and configure the Drupal CDN module
Now go to drupal.org and download and enable the CDN module.
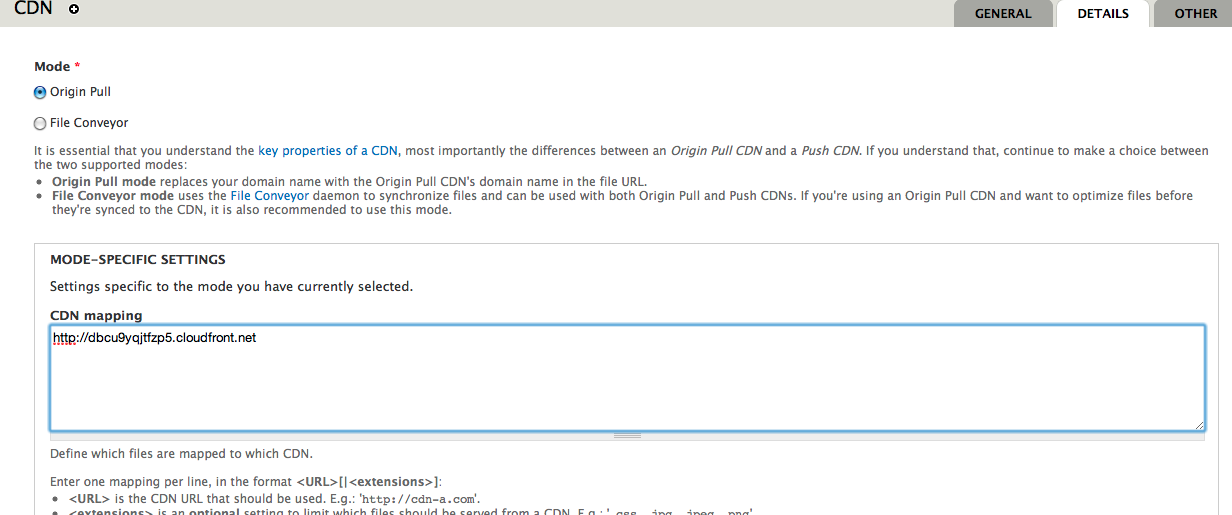
Once enabled, there are only two simple configurations that you need to do. Go to /admin/config/development/cdn and click on the details tab. In the 'CDN-mapping' text area paste in the URL, you got from CloudFront and remember to put HTTP in front of it, and click save.
That's it! Now all files on your site will be pulled automatically to the CDN and be served to the world from the closest location.
Get awesome tech content in your inbox
Get awesome tech content
in your inbox
Just like how your fellow techies do.
Ready to get started?
We'd love to talk about how we can work together
AWS CLOUDCOST
Take control of your AWS cloud costs that enables you to grow!

